


Terrariums are something that I always thought were a little daunting but I’ve totally changed my mind. I just had to do it and now know how easy and fun they really can be.
So let’s start with the basics. Terrariums come in all shapes and sizes but boil down to being either open to the air or closed with a cover. If you go the covered route, you will have to do less watering. Condensation will do the work for you. Overall, they require a little up-front cost for materials but are really low maintenance and worry free. But I have an idea for that! Why not have a terrarium party?! Because any reason to have a party is a good one. This way you can cost share on materials. Have everyone take something from the list below (including food and bev) and you’re set for a fun Friday night.

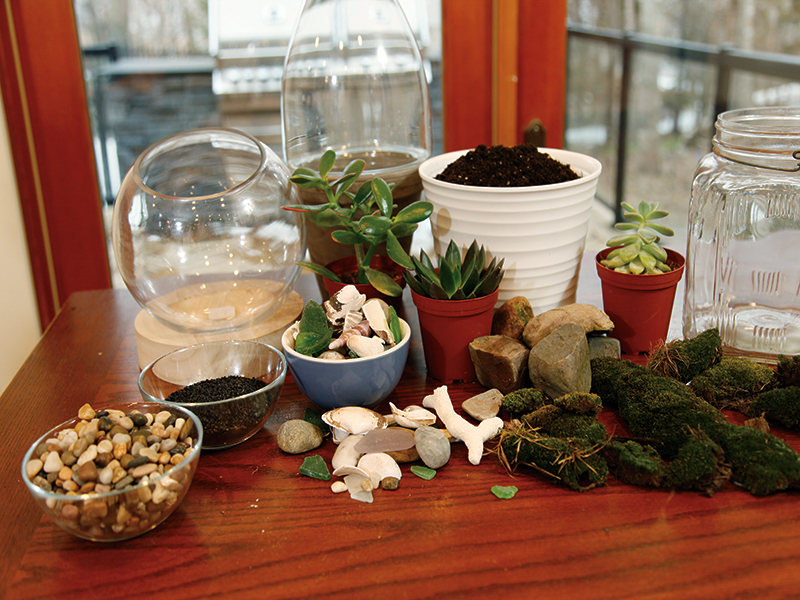
Here’s what everyone will need to plant their own terrarium and where you can share.
Everyone
- GLASS CONTAINER with a wide opening, with or without a cover.
- SOME SMALL TRINKETS to personalize your mini landscape. Take a few options so you can play around with it.
- SUCCULENTS! Also available at floral shops. Quantity depending on the size of your container. We used three and found them at McKean’s Flowers in New Glasgow.
Share
- ROCKS. Golf ball size down to pea gravel size.
- ACTIVE CHARCOAL. I found it at the pet store. It was for a fish tank filter. I just cut the mesh bag open and used the contents.
- MOSS. Don’t go into the woods and desecrate a beautiful woodland. There is moss everywhere if you look. I found mine near the edge of a barn where water runs. You can also buy it at floral shops.
- POTTING SOIL. Off the shelf is fine.
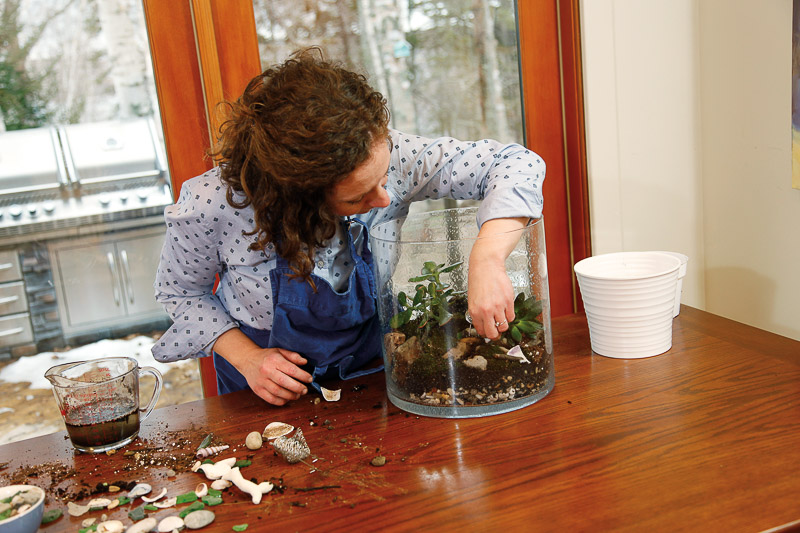
Layer the ingredients starting with the pebble size rocks. Next layer charcoal, then add a thin layer of soil. Ensure that each layer covers the whole base. Add larger rocks to build up certain areas and/or give more structure. Tuck your plants in and hold them out of the way with one hand, while adding more soil in and around the roots. Make sure there are no air pockets in the soil. With your plants arranged, layer in the moss and press in place. Each layer can vary in thickness from one to three inches. Again the size of your container will dictate the thickness as well.
Place your creation near a window or somewhere with nice natural light. Mist/water lightly if you don’t have it covered. Soak up the natural indoor beauty!


